 sales@xeeni.com
 GET QUOTE
Home / Know more / Fitted wardrobe installation day preparation guide

common
07 Jun 2026
Fitted wardrobe installation day preparation guide
Master your fitted wardrobe installation day preparation with our expert guide! Ensure a seamless, efficient installation by being fully prepared.
Fitted wardrobe installation day preparation is defined as the process of clearing your space, confirming structural details, and finalising all design decisions before your installation team arrives. Done correctly, it reduces disruption, prevents costly delays, and gives your installers the conditions they need to work precisely and efficiently. At Xeeni, we have seen firsthand how a well-prepared home transforms a complex bespoke installation into a straightforward, single-day process. The difference between a smooth fit and a frustrating one almost always comes down to what happens before the first panel is lifted into place.
How to prepare your space for fitted wardrobe installation
The most practical step in any wardrobe installation checklist is clearing the target area completely before your installers arrive. Every item of furniture, clothing, and personal belonging needs to be removed from the alcove or wall space where the wardrobe will sit. Installers cannot safely manoeuvre large panels around a bed pushed against the wall or boxes stacked in the corner.
Here is what to address in the days leading up to your installation:
- Empty the entire wardrobe area. Remove all clothing, shelving, and stored items from the space. If you are replacing an existing wardrobe, arrange for its removal beforehand.
- Lift rugs and protect your flooring. Dust sheets or protective covers should be laid across carpets and hard floors in the working area and along the access route from your front door.
- Remove fragile items from the room. Mirrors, artwork, and ornaments on nearby walls or shelves are at risk from vibration during drilling and fixing.
- Confirm clear access from the entrance. Installers carry long panels and bulky components. A clear path from your front door to the bedroom prevents damage and saves significant time.
- Arrange a nearby power socket. Power socket availability within close proximity is critical for the drills and electric tools used throughout the installation.
One preparation step that homeowners frequently overlook is decorating. Walls and ceilings should be painted or wallpapered before installation day, because access behind the wardrobe carcass is nearly impossible once it is fitted. Retrofitting decoration costs significantly more in both time and money.
Pro Tip: Move furniture from adjoining rooms if your walls are shared and thin. Vibration from drilling can shift pictures and knock over items in the next room.

Which technical checks are essential before installation day?
Technical readiness is the part of wardrobe assembly preparation that most homeowners underestimate. Wall type, surface levelness, and structural integrity all affect how your wardrobe is fixed and finished. Addressing these points before the team arrives prevents hold-ups on the day.
Work through the following checks in order:
-
Identify your wall type. Concrete, brick, and drywall each require different fixings and drill bits. Inform your installer of the wall construction so they arrive with the correct materials. Walls must be assessed for load-bearing capacity, as lightweight fixings on unsuitable surfaces risk wardrobe instability.
-
Check wall plumb and floor level. Use a spirit level to assess whether your walls are vertical and your floor is flat. Floor and wall levelness directly affects installation, with shims or custom scribing often needed for uneven surfaces. Knowing this in advance allows your installer to plan adjustments rather than improvise.
-
Confirm your final layout and internal fittings. Share the approved technical plan with your installation team before the day. Installation day should be execution-only, with no redesign or accessory decisions permitted on site. Last-minute changes to shelf positions or drawer configurations cause delays that can push a single-day job into two.
-
Notify installers if your wardrobe exceeds 2.5 metres in width. Wardrobes wider than 2.5 metres require additional team members to handle and position safely. Giving advance notice allows your installer to arrange the right number of people.
-
Book an electrician if integrated lighting is planned. Integrated lighting requires early arrangement with an electrician prior to installation day. Retrofitting lighting after the wardrobe is in place is significantly more expensive and disruptive.
| Technical check | Why it matters |
|---|---|
| Wall type identification | Determines correct fixings and prevents structural failure |
| Floor and wall levelness | Avoids gaps, misalignment, and scribing delays on the day |
| Final layout confirmation | Prevents costly on-site redesign and schedule overruns |
| Wardrobe width notification | Ensures sufficient team size for safe panel handling |
| Electrician booking | Avoids expensive retrofitting of lighting after installation |
Pro Tip: Ask your designer to supply a dimensioned technical drawing before installation day. Share it with your installer so they can review it independently and flag any concerns in advance.
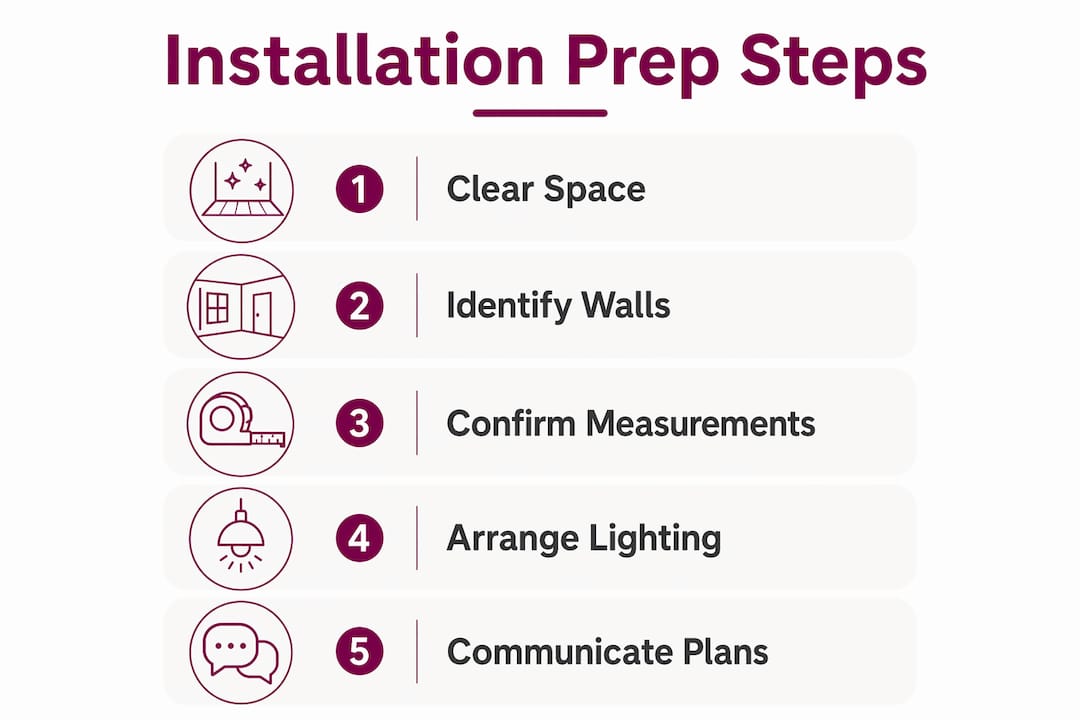
How should you communicate with your installation team?
Clear communication with your installation team is as important as physical preparation. The day of wardrobe installation runs most efficiently when the crew arrives knowing exactly what to expect, where to go, and what has been agreed.
Confirm the following before your installation date:
- Lock in all design decisions. Explore your wardrobe accessories and internal fittings options well ahead of time and finalise every choice. Changing a drawer configuration or adding a pull-out shoe rack on the morning of installation creates delays for the whole team.
- Share access details in writing. Communicating access details such as intercom codes, gate combinations, and parking arrangements helps installers arrive on time and without confusion. Send these by message or email the evening before.
- Confirm arrival time and your contact number. Installers need to know who to call if they encounter an unexpected issue on arrival. Make sure someone is present at the property for the full duration of the installation.
- Discuss known challenges in advance. If your walls are noticeably uneven, your ceiling slopes, or you have a chimney breast affecting the alcove, tell your installer before the day. This allows them to bring the right tools and allocate additional time.
- Agree on site cleanliness expectations. Discuss whether the team will remove packaging and offcuts, or whether you will handle disposal. Agreeing on this beforehand avoids misunderstandings at the end of the job.
“Installation day is not the moment for decisions. The team expects a fully approved technical plan to execute.” The bespoke wardrobe design service checklist
This principle applies equally to colour choices, handle selections, and internal configurations. If you are still weighing up options, use Xeeni’s design service to finalise everything in a structured consultation before your installation date is confirmed.
What common challenges can preparation prevent?
Even experienced installation teams encounter complications on site. The difference is whether those complications were anticipated or not. A thorough pre-installation site survey and a prepared homeowner resolve most issues before they become delays.
-
Irregular wall levels requiring scribing or trimming. Walls that bow or lean mean panels need to be scribed to fit precisely. Documenting multiple height, width, and depth measurements at the survey stage identifies this early, so your installer arrives with pre-cut scribing strips rather than improvising on the day.
-
Missing parts or incorrect delivery. Components that were ordered incorrectly or damaged in transit cause immediate hold-ups. Check your delivery against the order confirmation as soon as it arrives, not on installation morning. Report any discrepancies to your supplier immediately.
-
Dust and debris spreading to adjoining rooms. Cutting and drilling generates significant dust. Close doors to adjoining rooms and cover ventilation grilles if possible. Placing a dust sheet across the doorway of the installation room reduces the spread considerably.
-
Delays from last-minute design changes. This is the most common and most avoidable cause of installation overruns. Once manufacturing is complete, changes to dimensions or internal configurations require new components and a rescheduled visit. Finalising your bedroom design ideas during the design phase, not on installation day, protects your timeline.
-
Underestimating installation duration. Small built-in wardrobes take approximately 3 to 4 hours, while full wall units with sliding doors take 5 to 8 hours or more. This means you should plan to be at home for the full day and avoid scheduling other tradespeople or deliveries during the same window.
Key takeaways
Thorough fitted wardrobe installation day preparation requires clearing the space, confirming structural conditions, finalising all design decisions, and communicating access details to your installation team before the day begins.
| Point | Details |
|---|---|
| Clear the space completely | Remove all furniture, rugs, and fragile items from the installation area and access route. |
| Decorate walls before installation | Paint or wallpaper behind the wardrobe area in advance, as access is impossible once fitted. |
| Confirm technical details early | Check wall type, floor levelness, and wardrobe width to avoid on-site surprises. |
| Finalise all design decisions | No changes should be made on installation day; approve layout and fittings beforehand. |
| Communicate access and challenges | Share intercom codes, parking details, and known structural issues with installers in advance. |
What I have learned from watching installations go wrong
From my experience working alongside installation teams over many years, the single most damaging thing a homeowner can do is treat installation day as a continuation of the design process. I have watched jobs that should have taken five hours stretch into two days because a homeowner decided on the morning to swap a hanging rail for extra shelving. The components were not on the van. The manufacturer needed to be called. The whole schedule collapsed.
The second most common oversight is inadequate space clearance. Installers are professionals, not removal men. When they arrive to find a bed still against the wall and boxes stacked in the alcove, they lose time they cannot recover. I would always advise moving furniture out of the room entirely the evening before, not the morning of.
What works consistently well is a pre-installation call between the homeowner and the lead installer, ideally two to three days before the job. Use it to confirm the layout drawing, discuss any structural quirks, and agree on the day’s schedule. That fifteen-minute conversation prevents the majority of on-site problems I have seen. The homeowners who do this almost always report a smoother, faster installation. Those who skip it rarely do.
— Kiran
How Xeeni makes your installation day straightforward
At Xeeni, we design every fitted wardrobe project so that installation day is the simplest part of the process. Our team works with you through a free design consultation to finalise every measurement, material, and internal fitting before manufacturing begins.
Our professional installation teams arrive with a fully approved technical plan, the correct fixings for your wall type, and the experience to handle everything from standard alcoves to complex loft spaces. Whether you are planning a walk-in wardrobe or a bespoke fitted bedroom, Xeeni’s aftercare guarantee means we stand behind the quality of every installation. Book your free design consultation today and let us handle the complexity from the very first measurement.
FAQ
How long does a fitted wardrobe installation take?
Small wardrobes take 3 to 4 hours, while full wall units with sliding doors typically take 5 to 8 hours or more. Plan to be at home for the entire day and avoid scheduling other work during the same window.
What should I do with existing furniture before installation day?
Remove all furniture, rugs, and personal items from the installation area and the access route from your front door. Moving furniture out of the room entirely the evening before is the most reliable approach.
Do I need to arrange an electrician separately?
Yes, if your wardrobe includes integrated lighting or requires a new power point. Integrated lighting must be arranged with a qualified electrician before installation day, as retrofitting it afterwards is significantly more costly.
Can I make design changes on installation day?
No. Installation day should be execution-only, with all layout, finishes, and internal fittings confirmed beforehand. On-site changes require new components and typically result in a rescheduled visit.
What information should I give my installers before they arrive?
Provide your contact number, intercom codes, parking details, and any known structural issues such as uneven walls or a sloping ceiling. Sharing access details in advance helps installers arrive on time and prepared for the specific conditions of your home. You can also review common questions on the fitted bedrooms FAQs page for further guidance.